I guess I have a thing for using candy in crafts.
I’m not even a sweet tooth.
Give me a salty bag of chips, and I’m good.
But, using candy in crafts???
L.O.V.E.
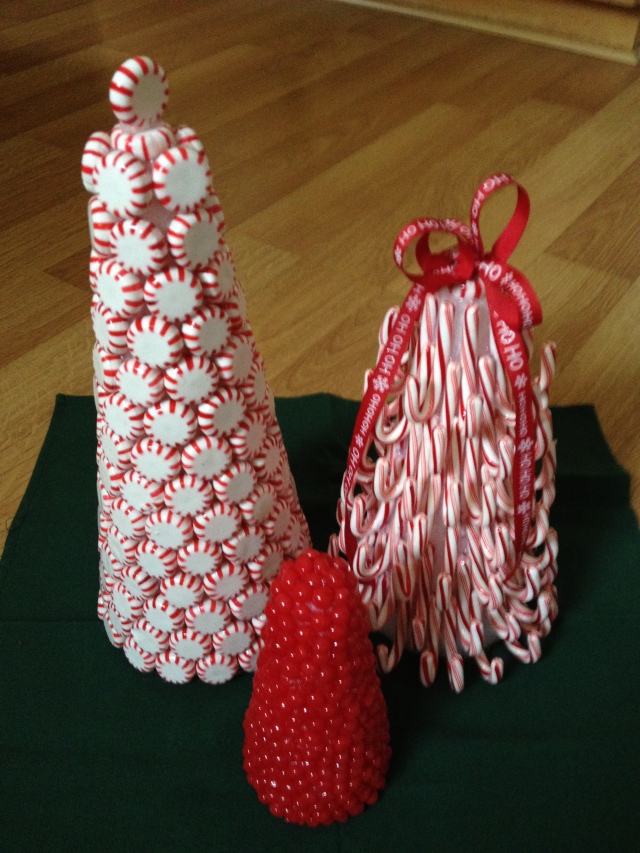
So, I saw this idea for making Christmas trees using candy from Better Homes and Gardens and this is how mine turned out!
I’m thinking these would also make great teacher gifts. Trust me, I was once a teacher, and there is only so many mugs and candles one can handle.
Materials:
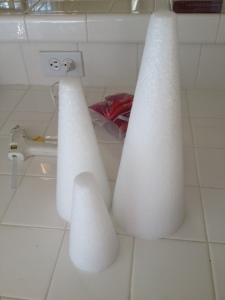
* 3 Styrofoam Tree Shapes in 3 different sizes
* Glue gun with lots of glue sticks!
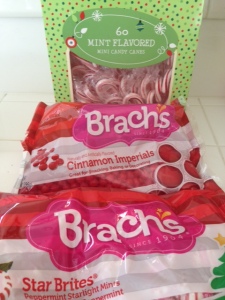
* Candy Canes (I ended up using 2 bags that each had 60 canes in them because so many were broken in the box…although this was to the delight of my children who got to eat the broken ones!)
* Cinnamon Swirl Candies (I needed two bags of these as well)
* Red Hots (only one bag, with plenty of them left over to eat!)
* Ribbon
* Clear Acrylic Spray Paint Sealer
Directions:
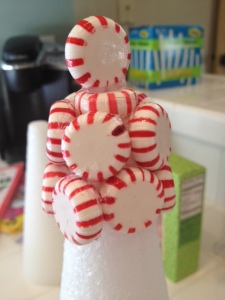
I started off doing the circular peppermints first.
Begin the tedious task of unwrapping all those little mints! ARGGG!! This is not my idea of fun. Maybe you could bride a child helper over Thanksgiving break to help with this part!
Child: “Mmmmooooommmmm, I’m BORED!”
Mom: “Want to help me unwrap some candy? You can eat all the broken ones!!!”
Child is instantly at your side.
Anywho, note that there is one mint glued to the top of the styrofoam FLAT and then the other is glued straight up on top of that!
Then, I just used my hot glue gun and went around and around the styrofoam.
I’m not going to lie, these do not align perfectly in the back. SO, I recommend always starting your new row from the same spot and kind of have a “mess up” line down the back. Not sure where I will be displaying mine, but definitely somewhere you can’t see that mess up line!
Yes, I’m sure there are many of you talented and patient people out there that will figure out how not to have a mess-up line….I’m not one of them.
And, I’m going to need to look up how these little mint are made because they were all different sizes. Occasionally, different shapes. Wierd.
I also discovered that when you get near the bottom, you can use a sharp knife to cut the candies in half so you can finish that last row, if needed.
Moving on to the Candy Cane Tree…
More bribing may be necessary here to unwrap all those little canes!
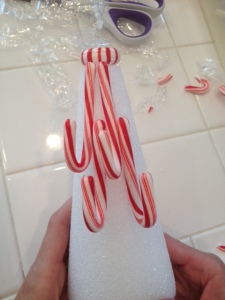
First, use one of your leftover circle cinnamon mints to glue flat to the top of the styrofoam.
Then, glue your first candy cane on, getting as close to the top mint as possible.
For the next candy cane, decide where you want your next row to begin. You can look at the picture to see approximately where I did mine. Glue that one on. The, go back to your top row and glue that one on. Basically, you’re working on two rows at the same time. Continue all the way down in the same format.
For the candy canes, using a sharp pair of scissors help cut some down in size when I got near the bottom!
AND, hold off on that bow until after you spray them!
Last but not least, go for the Red Hots!
These were by far the easiest to do. No opening little packages, just jump right in and start gluing away! Cover the styrofoam completely.
Finally, grab your can of clear acrylic spray paint, head outside, and spray the trees from ALL angles!
This will make the trees less sticky, but also adds a beautiful shine to the candy!
I also assume this would make it less attractive to ants!
After they are dry, you can add a bow to the top of the candy cane tree. I am not great at tying bows. For mine, I tied two bows like you would tie your shoes and then glued one on top of the other.
Have fun!

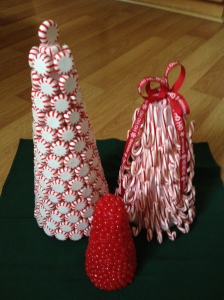


So cute! My favorite is the candy cane one. Love this idea!
LOVE! Im thinking this may be a project on thanksgiving day or over xmas break. thanks!
I really like the red hots idea. Very clever
These came out so cute!!
So cute!!! Thanks for sharing! Your crafts are always the best!
Santa says:
I love it! I showed them to Mrs. Claus and she could not wait to get started!
Rudolph is licking the Red Hots already. Yum Yum!
Thanks for sharing such cute ideas!
the only problem with these ideas is that they don’t become edible after you are finished, but its cute
I have done something similar to this but we don’t unwrap the candy. I use straight pins and pin the candies to the tree,that way they can be eaten.
These are terrific ideas! It made me think how cute styrofoam balls would be, covered in red hots and turned into Christmas tree ornaments. I may try it! :0)
LOVE THESE GREAT IDEAS, I AM NOT CREATIVE SO I LOVE OTHERS COMING UP WITH THEM, LOL. I’M GOING TO USE THE MINTS, LOVE IT, THANKS
Pingback: 100 Days of Christmas – Day 50 - Simply Sherryl
I use the mints but don’t unwrap them. The wrap adds a sparkle to the tree. I also put a sparkly star on the top.
Pingback: 18 DIY Candy Cane Christmas Tree Ideas | Guide Patterns
Pingback: Christmas Ideas Using Candy Canes | gudanginfo.me
Pingback: Candy Christmas Tree – Wallpaper Site